Although the feature is valid, it can cause issues for many. For example, many people prefer to turn off the adaptive brightness completely. So, if you are also looking for the same, you have landed on the right webpage. In this article, we will share a step-by-step guide on how to turn off auto-brightness on Windows 10 and Windows 11 operating systems. But before jumping into the steps, please note a few things.
How Auto-Brightness works?
Please note that the automatic brightness is only available on Windows devices with built-in screens such as tablets, laptops, all-in-one PCs. If you are using an external monitor, you might see the controls for adaptive brightness because the feature does not apply to your monitor. Also, some monitors automatically change the brightness based on what you are viewing. This is done via any third-party application like NVIDIA Control Panel. So, now let’s check out how to turn off auto-brightness in Windows 10/11. Also read: How to Find Your Windows 11 Product Key (3 Methods)
Steps to Turn Off Auto-Brightness on Windows 11
Important: We have used Windows 11 to demonstrate the process. You need to implement the same changes on your Windows 10 operating system.
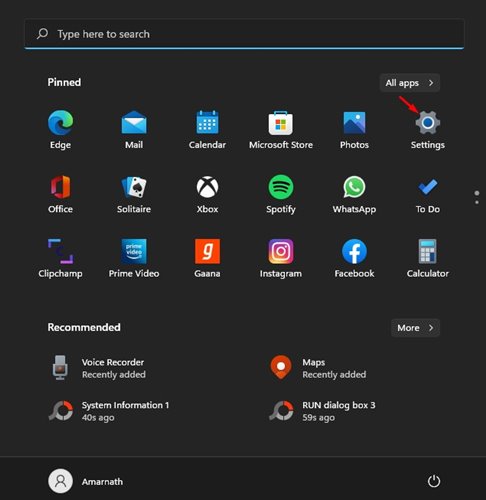
- First of all, click on the Windows 11 start menu and select Settings.
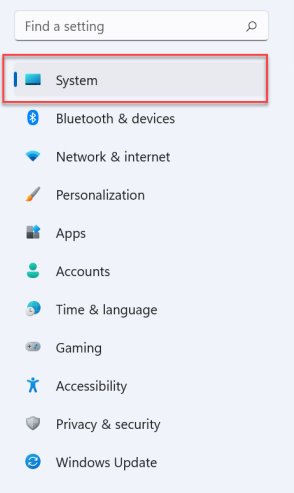
2. On the left pane, click on the System tab as shown below.
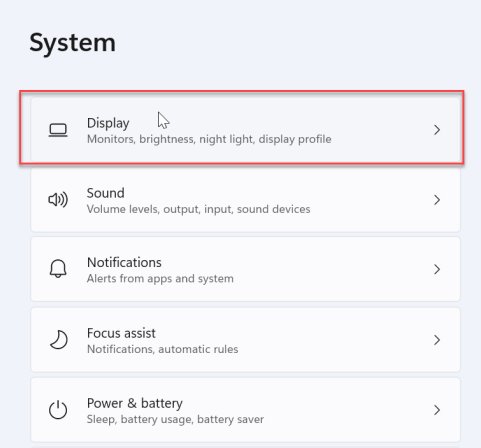
Now, click on the Display option on the right pane, as shown in the screenshot below.
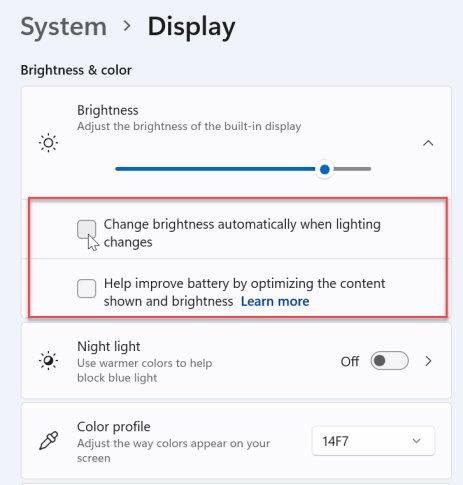
Under the Brightness & color, uncheck both options as shown in the screenshot.
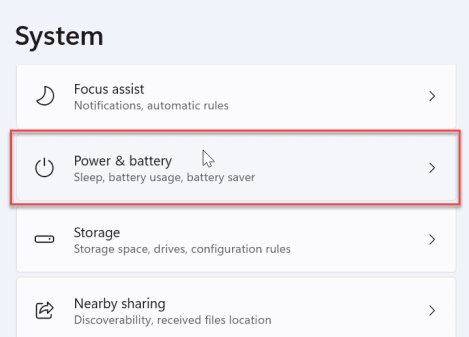
Now, move back to the System tab and click on the Power & battery option.
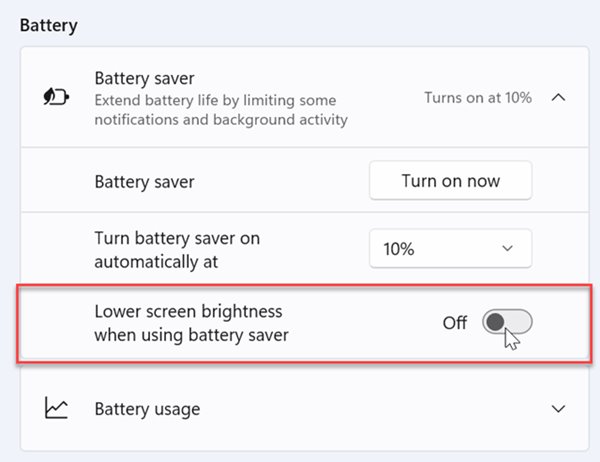
Under the Battery saver, turn off the Lower screen brightness when using the battery saver option.
That’s it! You are done. This will turn off the auto-brightness in Windows 11. It’s pretty to turn off adaptive brightness in Windows 10/11. If you didn’t like the change, you could revert your changes. I hope this article helped you! Please share it with your friends also. If you have any doubts related to this, let us know in the comment box below.
